Jobb (Grundläggande): Lägg till manuellt eller automatiskt
Varje jobb är en individuell tjänst som kunden betalar för. Ett jobb går till en pipeline som är särskilt utformad för den tjänst som krävs. När en pipeline har skapats kan du lägga till jobb i den.
Täckt här:
- Vad du bör tänka på när du lägger till jobb
- Lägg till jobb manuellt
- Lägg till jobb automatiskt via formuläret för kundregistrering
- Lägg till jobb automatiskt med hjälp av ett pipeline schema

Webbinarium - Workflow automatisering: Optimera dina interna processer! Tisdag, 1 EST. Registrera dig här
Vad du bör tänka på när du lägger till jobb
Tänk på följande:
- A firm owner, admin, or any employee for whom the pipeline is available, adds jobs to a pipeline.
- Employees can see only the pipelines made available to them.
- Employees can see, add, move, delete jobs only for their assigned accounts unless they have access rights to view all accounts.
- New jobs can be added to any stage of a pipeline.
- Jobb kan läggas till för både aktiva och offline-konton, men endast användare med aktiva konton och aviseringar aktiver ade får e-postmeddelanden som skickas via pipeline automation.
- Du kan använda anpassade mallar för att spara tid när du skapar jobb.
Lägg till jobb manuellt
För att lägga till jobb till en pipelinevälj det sätt som fungerar bäst för dig:
- Gå till Workflow > Pipelines i det vänstra menyfältet, välj pipelineoch klicka sedan på Lägg till jobb.
- Klicka på NEW längst upp till vänster och välj sedan Job från menyn.
- Gå till Kunder > Konton i den vänstra menyraden, markera kryssrutorna bredvid de konton som jobbet gäller och klicka sedan på Lägg till jobb.
- Klicka på + Skapa nytt jobb när du länkar ett jobb från sidan för uppladdning av dokument och klicka sedan på Uppdatera jobblista när jobbet har skapats.

Nedan kan du läsa mer om de numrerade avsnitten:
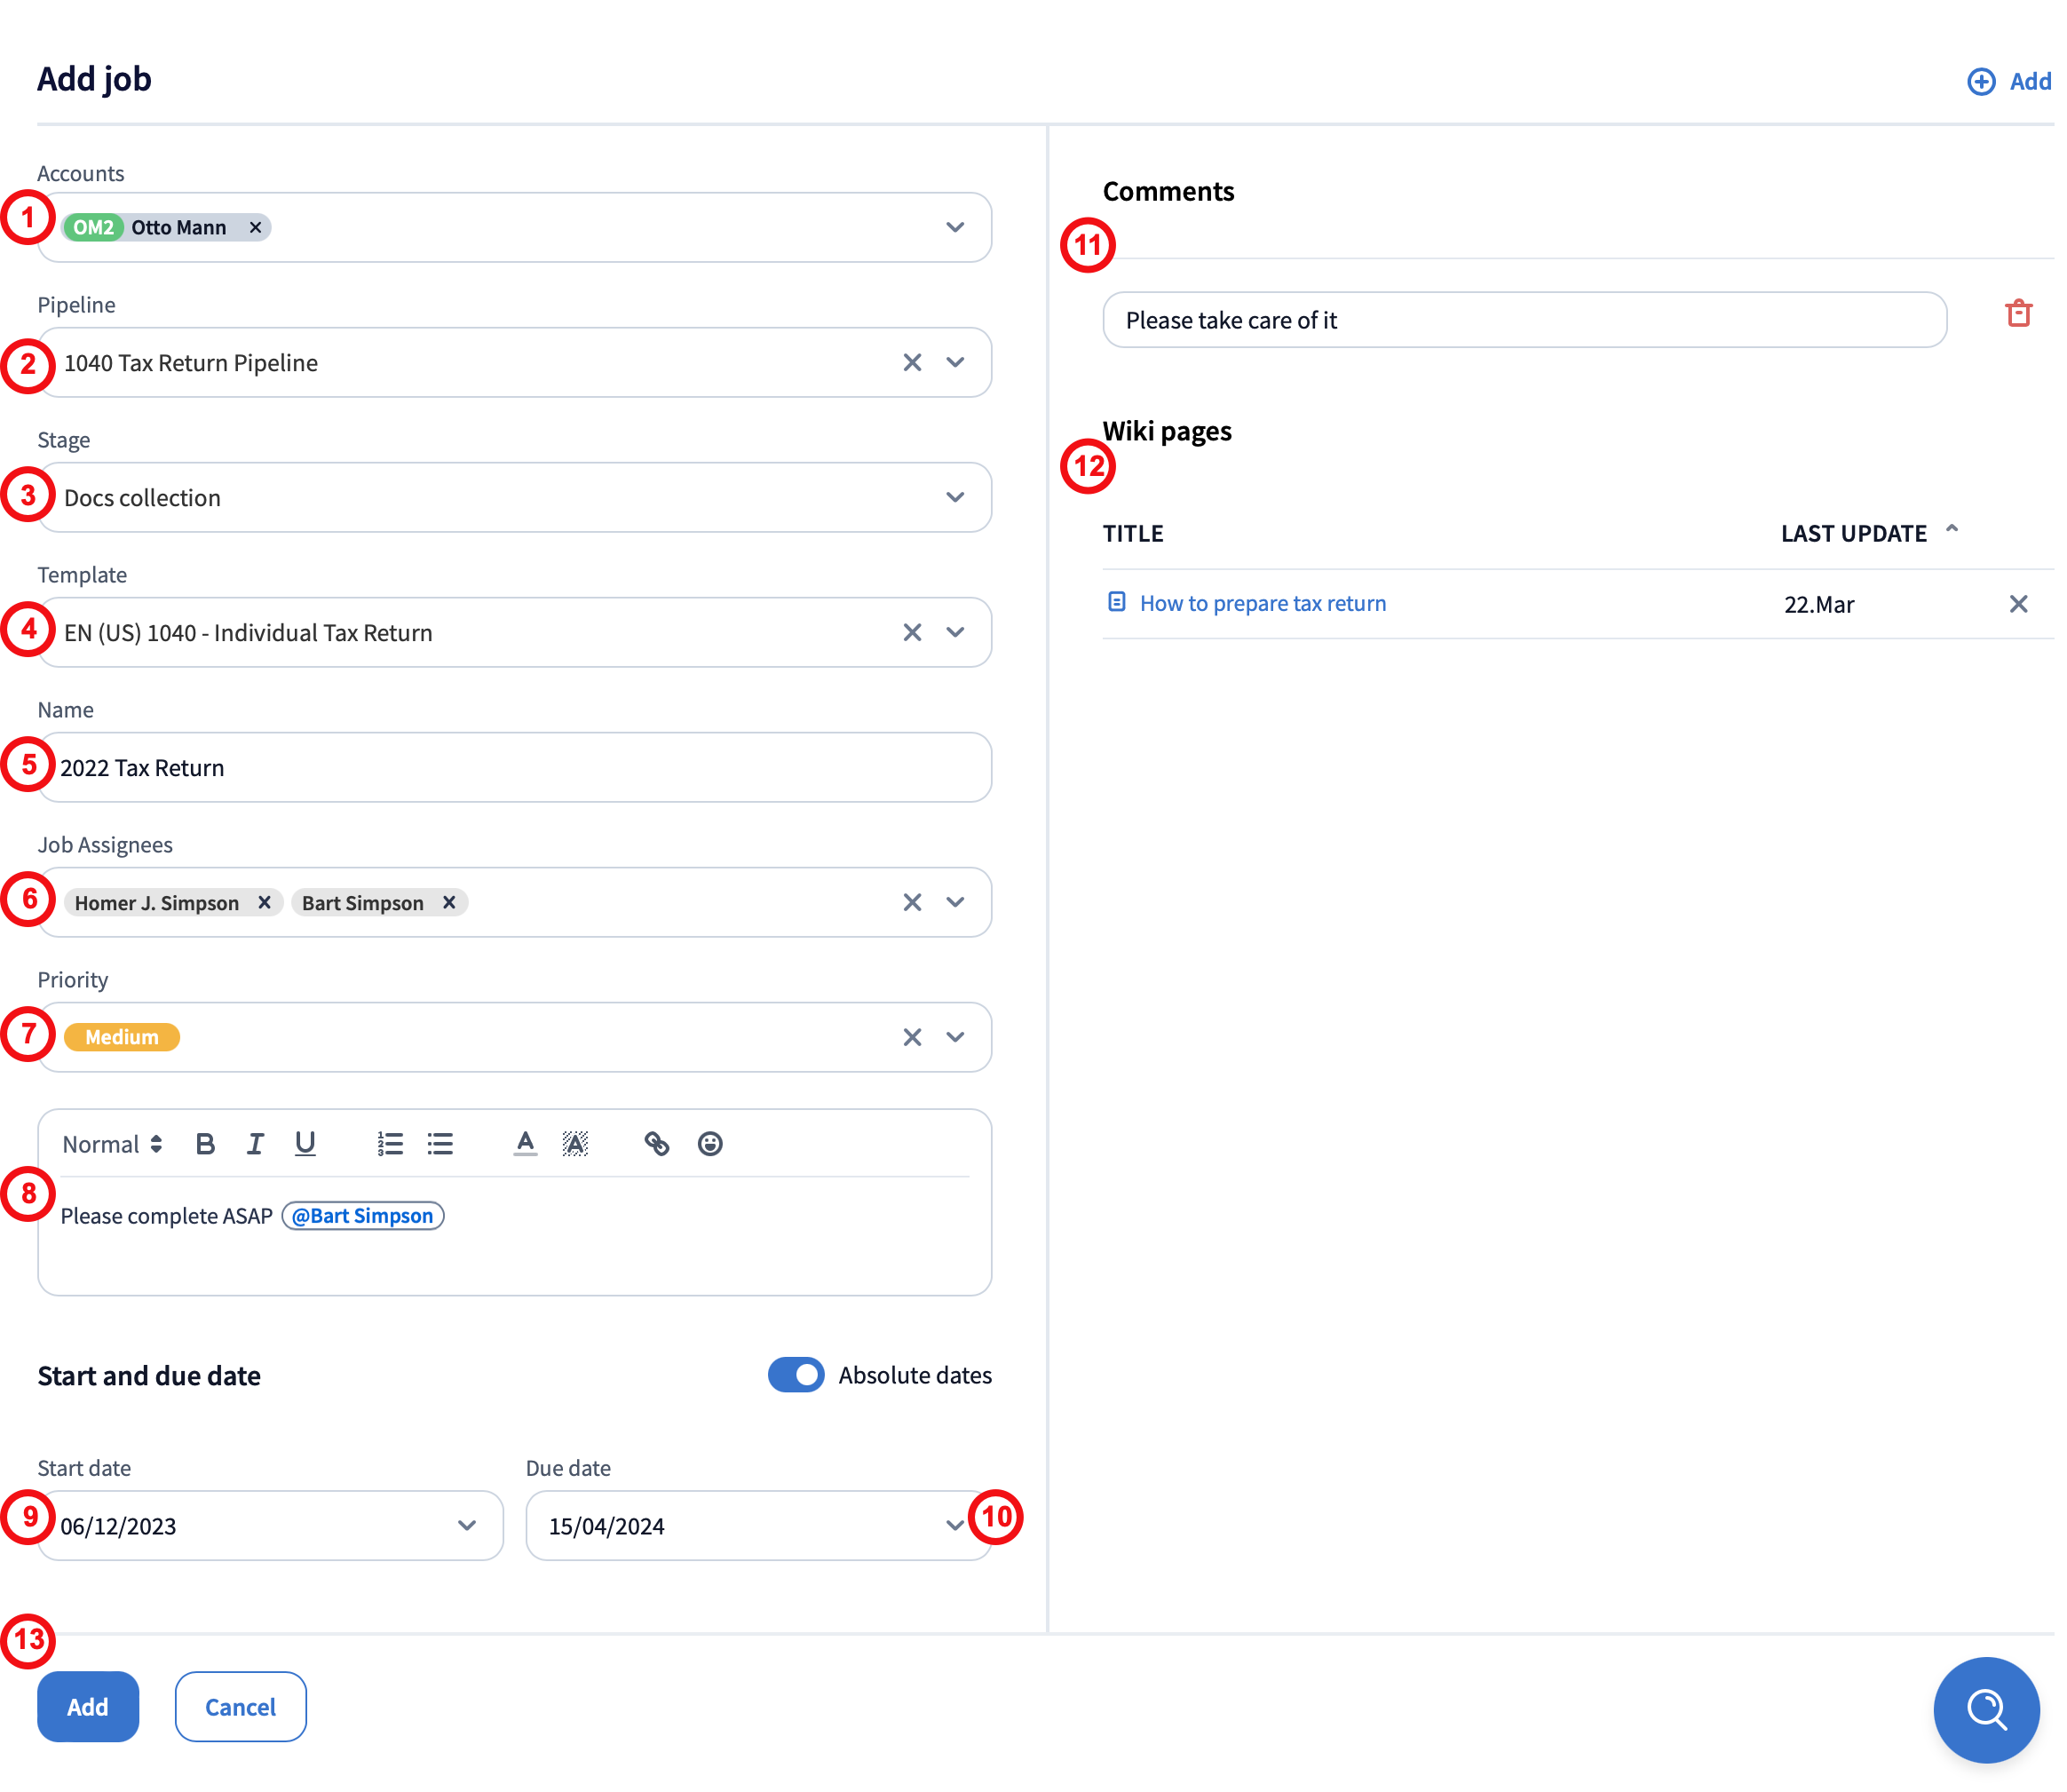
1. Accounts: Add or remove the names of accounts here. The job always performed for a specific account, so you need to select at least one from the list.
2. Pipeline: Select the pipeline for the jobs. (If you’re adding jobs from the pipeline itself, you can skip this)
3. Stage: Select the initial stage for the job in the pipeline. By default, the first stage is selected.
4. Template: To quickly create jobs, select a template with a custom job name, dynamic data (fields that automatically get filled in, such as with the date and account name), description, due date, comments, and so on. For more details about job templates, go here.
5. Name: This is the name that is displayed on the job cards in a pipeline.
6. Assignees: Select the employees for jobs. To learn more about assigning jobs, go here.
7. Priority: Choose the priority level for jobs: Low, High, Medium, or Urgent.
8. Description: Use different text formatting, emojis, bullets, numbered lists, and even links here. You can also mention your team members to get them notified of the job without having to assign it to them. However, if they don't have access to the job, they will only receive the Inbox+ and email notifications but won't be able to open the job itself.
9, 10. Start Date, Due date: This is the date when the job has to be finished. Setting dates is optional but can be a helpful time-management tool. You’ll be able to identify which jobs are overdue by the exclamation mark icon next to their names in the jobs list.
11. Add a comment: Click the Add button on the top right to leave any useful notes here; for example, something your team members might need to know in order to do jobs.
12. Add a wiki page: If you have internal instructions for this kind of job, click the Add button on the top right to link them to the template for your team members.
13. Add: Click to add job(s) to a pipeline. If adding multiple jobs isn’t fully successful, you’ll get a notification explaining why in your Inbox+. Go here for more details.